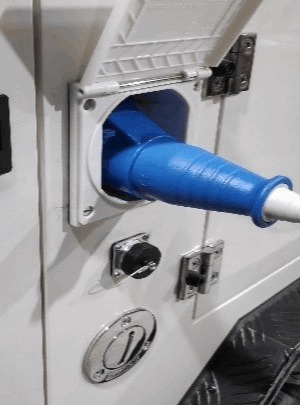
Manual / tips for adventure trailer atxl

Connections input:

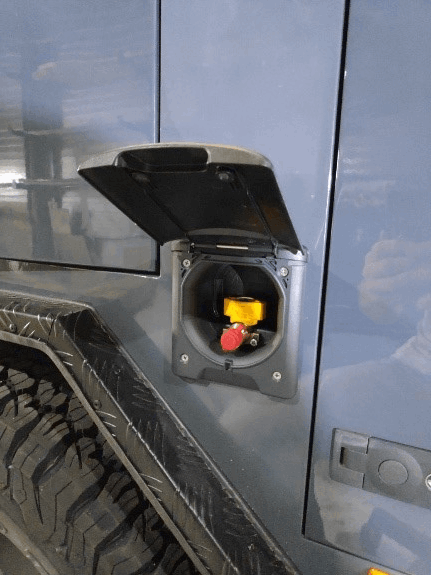
On the righthand side of the trailer there is on top a 230V CEE input for power from a landline or generator. No switches need to be switched. When connected the battery will automaticly charge at a rate of max 6 AH
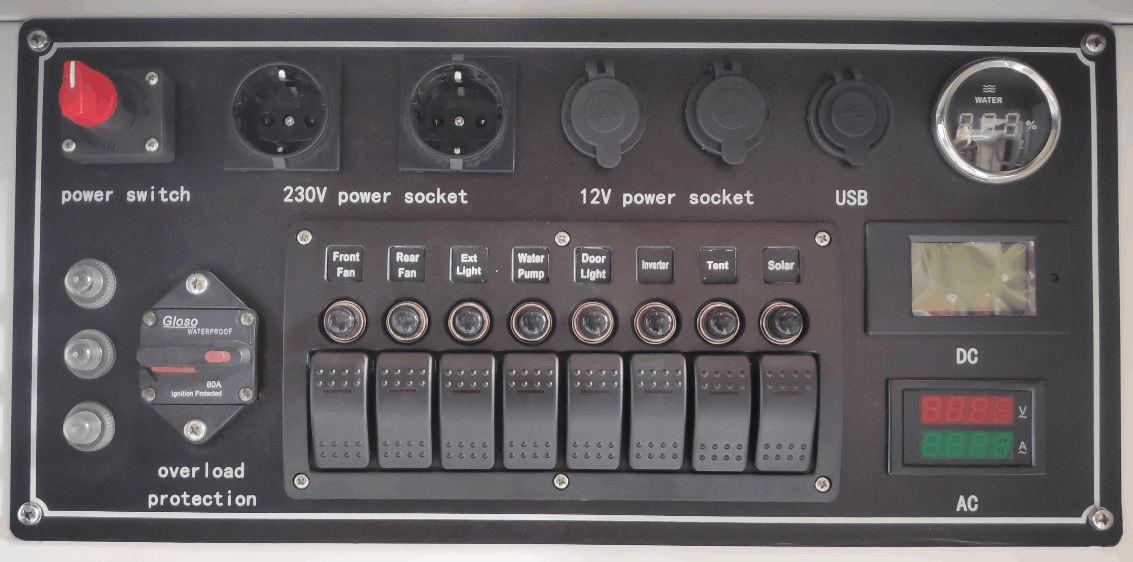
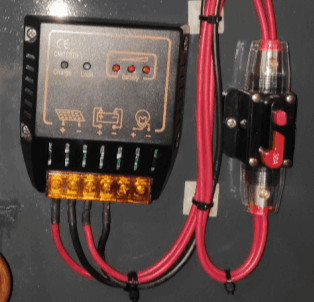
Below there is the 12V solarpanel connector for 120W the flexible solarpanel. To use and charge the Battery the Solarpanel switch on the controlboard needs to be switched on.
On the bottom there is the water inlet, a key is with the trailer and it can hold approximately 90 Litres of fresh water

Connections input:

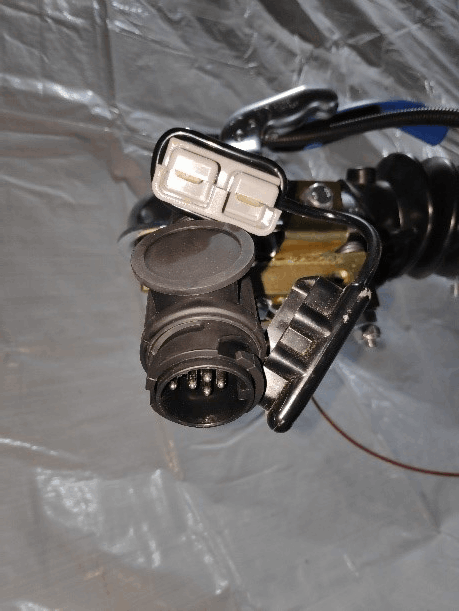
In the front of the trailer there is a 13Pole Trailerlight connector.
Furthermore, there is a Andersonplug to charge the battery directly from the car while driving. No switches need to be switched on the controlboard. A counterplug is provided and can be connected directly or over a switch to the onboard car battery. Please use a 16mm2 wires.

Connections output:

A optional gasoutput socket on the lefthand side of the trailer. Gashose needs to be connected before it is possible to open tap.

Doors, Drawers and compartments

All doors lock and unlock with the same keys. 4 Keys are supplied with a trailer

Doors, Drawers and compartments

All drawers have locking slides and some have security locks. Please note that all drawers are locked (clicking sound) before closing doors and before travel.
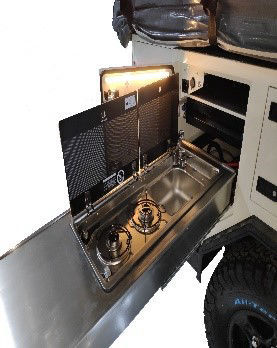
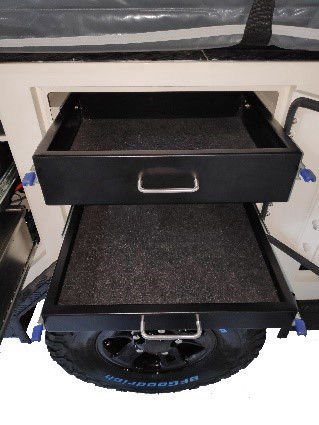
Kitchen Drawer

The kitchen is connected when in or out. To use water please switch on pump switch on control board. Pump is pressure activated and will turn on when tap is used. Please depressurize system when not in use.
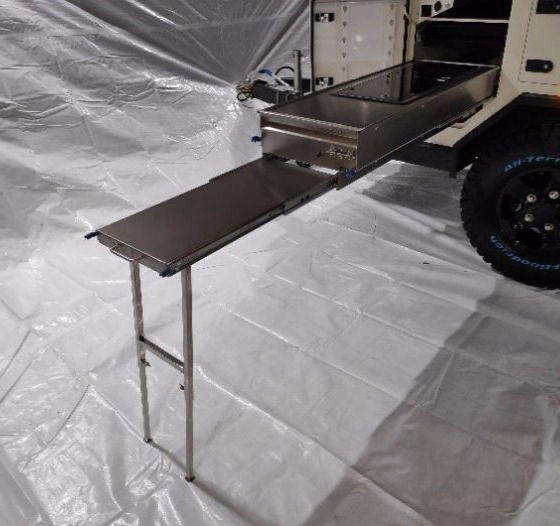
Kitchen Drawer

Please put out support legs under kitchen drawer when drawer is used or slides out.
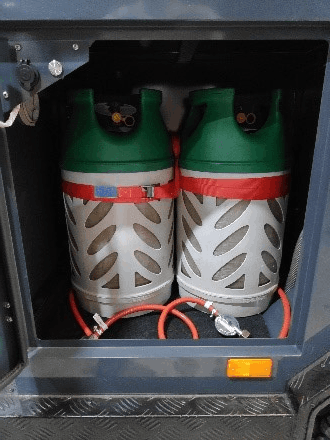
Gasbottle(s)

A gas-bottle can be put in the rear right hand-side compartment (optional 2 can be put in) please close gas-bottles and depressurize gas system when traveling or storing.
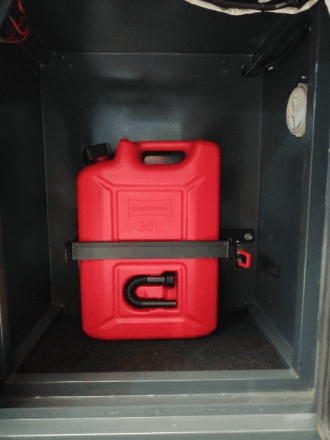
Jerrycan Holder

There is a jerrycan holder in the front right hand-side compartment. It can be taken out by two bolts or a optional Jerrycan can be put in.
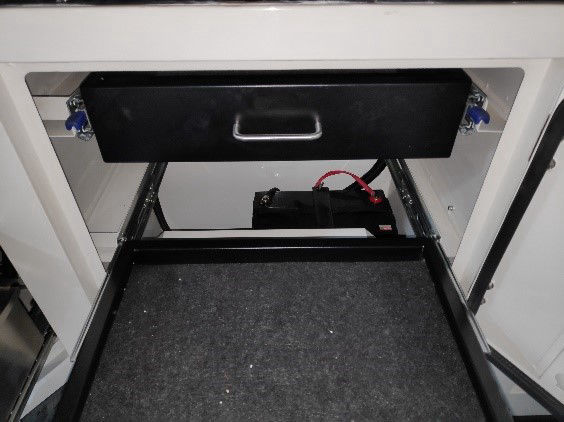
Battery

Under the drawers in the middle compartment on the left handside is the battery. This is standard a 100AH deepcyle. When the trailer is stored disconnect the +side and or charge the battery on a regular basis. This can either be done when disconnected with a suitable battery charger or when connected over the CEE power connection.
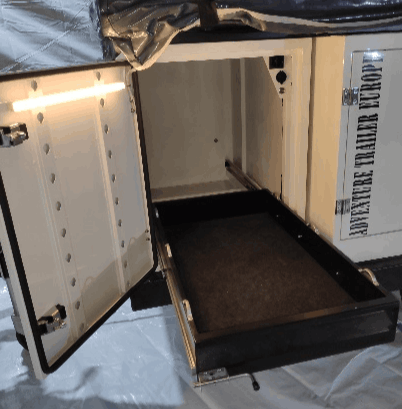
Fridge Compartment

Front compartment on the left handside is for the fridge. Please make sure that the fridge is fixed to the drawer while traveling. The fridge can be run over 12V during travel. Please switch on front fan on control board to circulate fresh air for cooling the fridge.
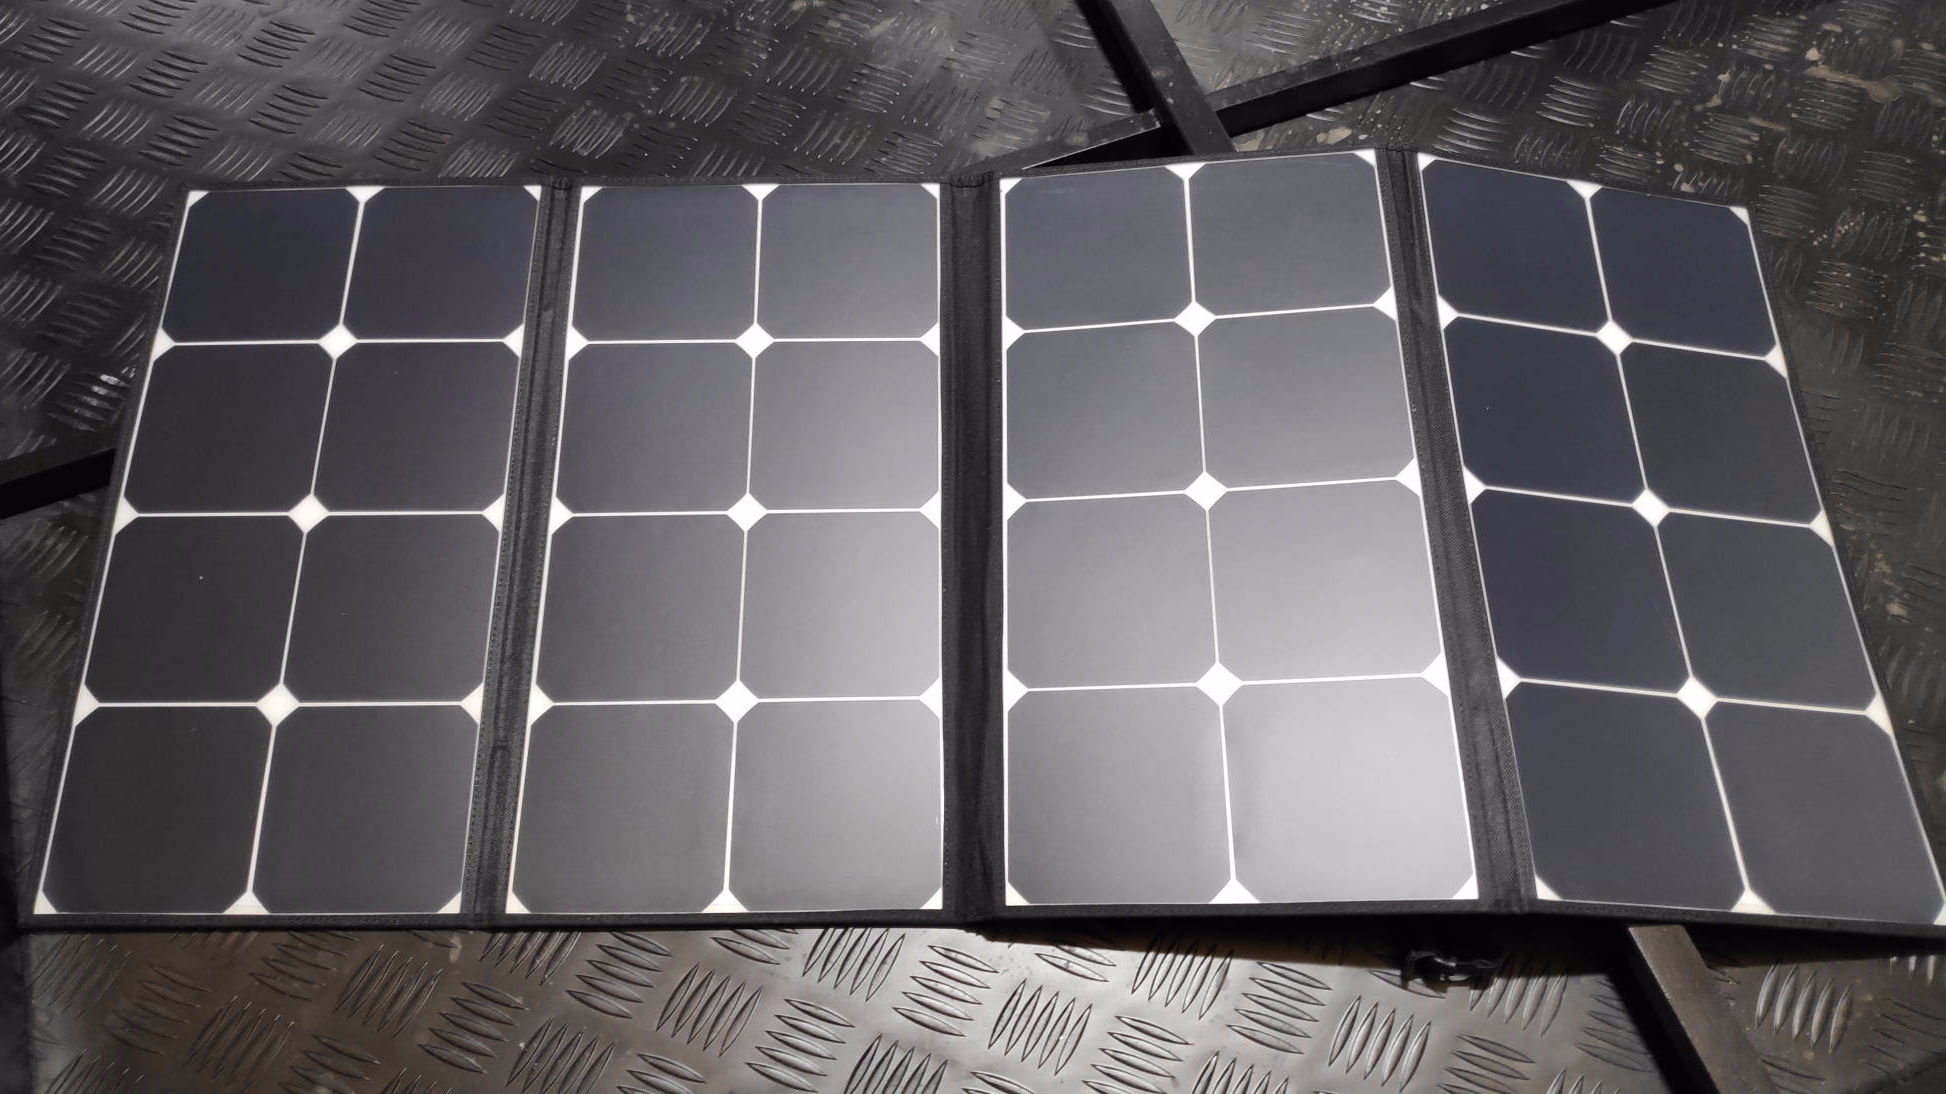
Solar panel

The solar panel can be connected to the trailer when there is no 230V connection. Switch it on on the control-board and it will charge and supply the trailer with up to 120Watts off power.
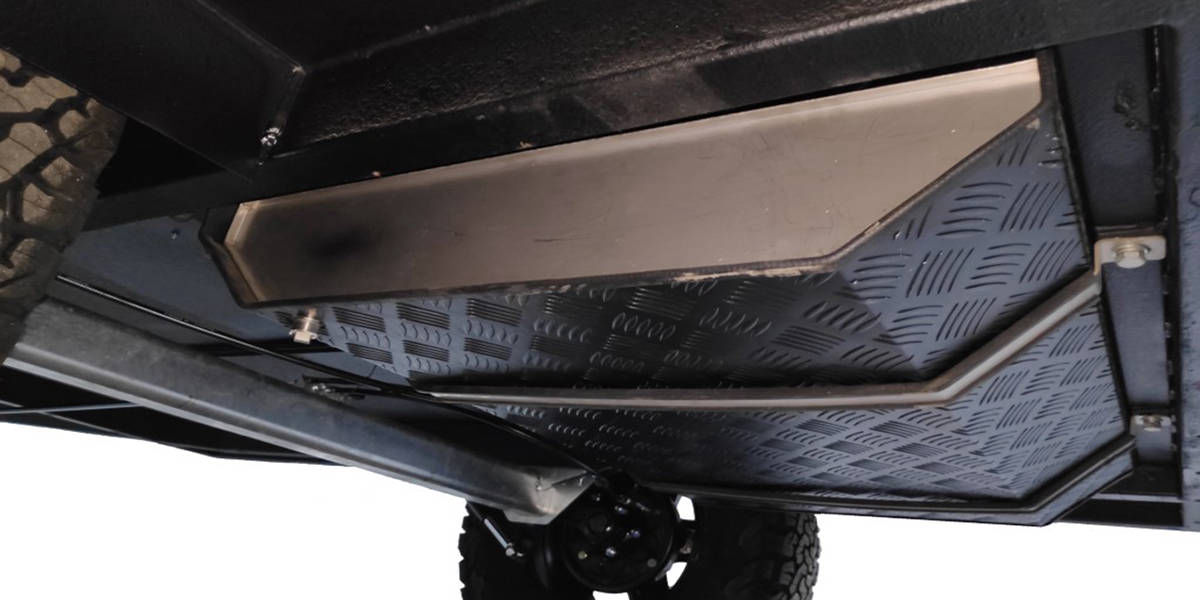
Axle and watertank

Maintenance free Knott Axle, after offroad (mud) spray down brakes.
Watertank, empty in winter and clean with watertankcleaner before use in new season

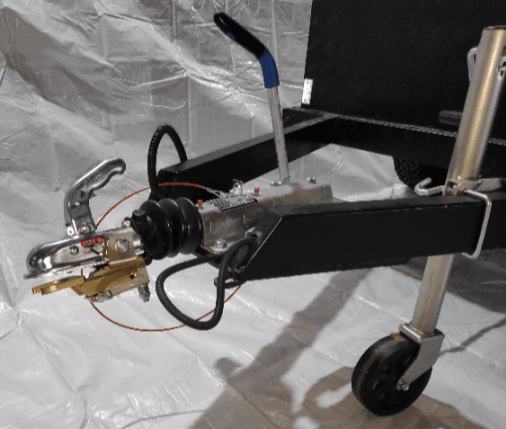
Coupling with optional Fixed Lock SCM.

Nosewheel please turn up completely then fold down when traveling. Optional Fixed Lock SCM against theft when parked and during travel.
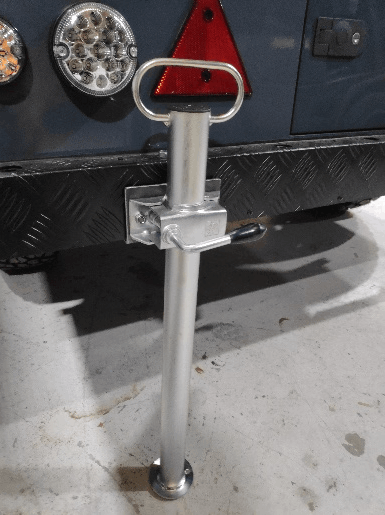
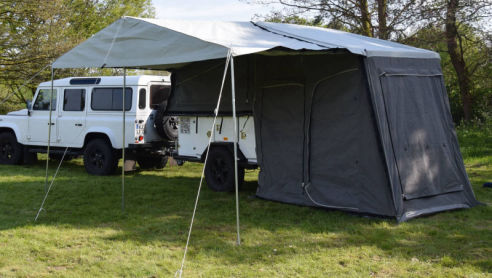
Supportlegs

Support leg to stabilize trailer when putting tent up. Remove rear support legs and store before traveling. Front support legs can be put to top position.

Optional spare wheel carrier

In case off a optional sparewheel on the rear this should be locked while traveling and turned outside when putting the tent up

Controlboard.

Mobirise

Power switch - Shuts off 12V from battery

230V Sockets - Provide 230V while CEE is connected or inverter is on

12V and USB - Provide 12V and 5V USB charging when powerswitch is turned on

Round water meter - Shows approx. level of freshwater

12V Auto Fuses and overload protection

Switches and Fuses - Switch as indicated

DC and AC meters - Provide information on power and consumption

AIR SUSPENSION 

In case of optional air suspension there is a extra panel with a power switch for the compressor and a switch for off-road travel. A remote is available to lower and raise the trailer.

230V fuse (FL switch)

230V Fuse between CEE and trailer

Solar charger and fuse

Solarpower charger with overload fuse.

TENT.

Tentpoleclamps

Tentpoles are being fixed after tensioning the canvas by the plastic poleclamps on the tentpoles.

Tentcover

The tent is covered on the trailer by a foilcover that is secured with velcro and a hd zipper which closes and opens on the rear off the trailer.

Setting up the tent

Fold the tent backwards and put support poles on rear in tent. Put tent pegs on the 4 corners first at trailer side and then at rear. pull tent floor strait. then extend all frame poles in tent to max.

Tentpole layout

Please note tent pole layout.

Annex fronttent

For easy connection off the roof of the front tent attach this when main tent is still low, not put up in total.

Walls front tent annex

Put up main tent and roof off front tent then zip sidewalls to fronttent and after that the floor can be put in,

Windows

Windows have either mes and cover or mesh, plastic and cover. Both cover and clear plastic can be opened, put up or rolled up, at your choice.

Ladder

The ladder is used to get access to the main bed. Also can be used for easy access to attach the roof of the annex to the main tent.

Setup the tent for newbies.


To set up first practise the set up of the main tent before adding the annex a few time.

• Take off cover
• First take off all extra pieces and parts.
• Keep all doors closed.
• Then put on the supportlegs to keep the trailer from tilting.
• Pull of the rear part of the tent from the back
• Go to one side of the trailer and grab the top frame 2 pieces and fold it to the rear
• Then take the extension frame and pull it back.
• Now put in 4 pegs first two at the trailer side then the two at the back
• Get one support pole with number 6
• Go through the side door and put it in the middle under the rear frame
• Now put the ladder in and extend all poles/frames to the max.
• Get a second number 6 pole and put them now in the corners at the back and extend.
• Get 2 number 7 poles short 6 version to support the end at the bed. (poles 10 and 11 can be put in the stretch the roof)

With a bit of practise this should not take more then 5 minutes and yes it will take longer at first.

To close it it is kind of reverse

• Close all windows and doors leave one door open in the middle about 1-1,5 metre.
• Shorten the frame on the extension and lock.
• Take all poles 6 and 7 out (If you have used 10 and 11 also take them also out)
• Take the pegs out.
• Grab the rear frame from the extension and push it to the trailer.
• Now there will be a lot of air in the tent needing to escape through the half open door.
• Fold the side of the tent in between the frame on the side and pull the extension side by side over the trailer( if necessary clean/dry the bottom with a cloth)
• You can pull the bottom on the trailer by standing on the front frame of the trailer.
• Put all bits and pieces back on the trailer.
• Take the rear support legs off put them on the trailer.
• Put cover over and close.

This will take a bit longer depending on cleaning of bottom and time it take to let the air out. But no more then 10-15 minutes.

To put on the annex this can be done alone but a pair of extra hands is easier.

• Take off cover
• First take off all extra pieces and parts.
• Keep all doors closed.
• Then put on the supportlegs to keep the trailer from tilting.
• Pull of the rear part of the tent from the back
• Go to one side of the trailer and grab the top frame 2 pieces and fold it to the rear
• Then take the extension frame and pull it back.
• Now put in 4 pegs first two at the trailer side then the two at the back
• Get one support pole with number 6
• Go through the side door and put it in the middle under the rear frame
• Get a second number 6 pole and put them now in the corners at the back and extend.
• Do not extend front and rear frame to max and keep middle frame piece as low as possible.
• Zip on roof of front tent and put felcro as tight as possible.
• Take pole 1 and 3 and put the hook in the top of on the main tent end 3 through 1 in the roof of the annex together with 5 and 8 secure elastic on pole. Put them up to walk under height
• Now do the same with 1 and 2 and 8
• Then 1, 4 5 and 5
• Then 1, 2 and 5
• Now extent the main tent to max height and adjust the roof of the annex to level.
• Zip on sides attach felcro to poles put poles in pockets.
• Put in floor.

Putting up the annex will take some more practise and time, but it is mainly meant for longer stay periods. For short periods or overnight stays it is easier to put a extra sunshade tarp with clips to the main tent with one or two poles. 

Address

Ambachtsweg 15
6581 AX Malden
The Netherlands   


Contacts

Email: sales@adventuretrailer.eu
Telefoon +31 653 393 859
Whatsapp +31 653 393 859
Signal +31 653 393 859

Businesshours

Open on appointment

Links
Feedback

feedback will be appreciated.

Commercial info

Chamber of Commerce (KVK) 70845425
VAT (BTW) nr. NL001886144B68
Bank NL68 RABO 0327 2346 36

Previous trailer ATXL, Manual no longer available!

Mobirise.com